Patch Squint , simplesmente incrível!

I’m back from London and so glad to be here on decor8 again because I’ve missed you very much! I really dislike being unplugged for so long but I hope that you have enjoyed a few of the guests that have posted while I was away. How have you been? I caught a virus while away, so the last half of my trip was a bit of a downer as I spent wayyy to much time in my room but what can you do?

Squint

At least I enjoyed the first part of my trip and so next week I’ll be back here blogging full-time and also talking about some of the places that I visited including a bit of a “Best of London” through my eyes so that if you plan to visit you will have some special addresses in your pocket while you’re there. The first must-see that I’ll share before we begin the weekend is Squint, an eclectic atelier and shop that I visited and enjoyed very much though I wish I had spent more time there but was in a bit of a rush between appointments Just look at the beautiful things that I saw up close + personal. Inspiring, or what?

Squint

Squint

Squint

Squint

Squint

Squint

Seeing Chesterfield sofas and Egg chairs covered in a melody of patchwork in some of my favorite fabrics was such a delight. I briefly spoke to the owner/designer Lisa Whatmough and also had a quick conversation with a lovely designer whom I was able to watch create a patchwork pattern on a dresser which inspired me so much! I was told that they use a combination of fabrics that range from new prints from companies like Designers Guild to vintage prints that are no longer being produced. Each piece is an original and I fell in love with the magical colorways and overall cheerfulness that you couldn’t help but feel when looking at any of the Squint items.

If you are in London I highly suggest dropping by (178 Shoreditch High Street, London) — it’s such a delight! If you’d like to learn more about Lisa Whatmough, you can read an interview that Mydeco had with her here.

Would you like to have something from Squint in your home? What would it be? I would like a bench for my entryway. 🙂

(images: squint)

Mesa feita com caixas de vinho. Amei! Vintage Wine Crate Coffee Table

DIY Vintage Chic: Vintage Wine Crate Coffee Table.


Vintage Wine Crate Coffee Table

***While I’m thrilled to share my step-by-step directions, the good and the bad, these are intended for your personal use. I’m always happy to hear and see what my bloggers have been working on. BUT a lot of work goes into these creations and while I have no issues sharing so you are able to create the work for your precious homes please understand that selling an exact duplication of my design is highly frowned upon. 😦 Please always be considerate of another artists work. It’s heartbreaking to see your ideas and creations basically stolen. Art is about taking ideas and making it your own. Take my creation, use the directions to get you started but make it your own. That’s the fun part! You’ll be surprised with what you can come up with. Thank you!***

At last! I’ve finally finished my coffee table and I’m so excited to reveal it! I’d love to say it’s perfect but like with any art project, given the chance to do it over again I would change up a few steps. But it’s still pretty cool! 😉

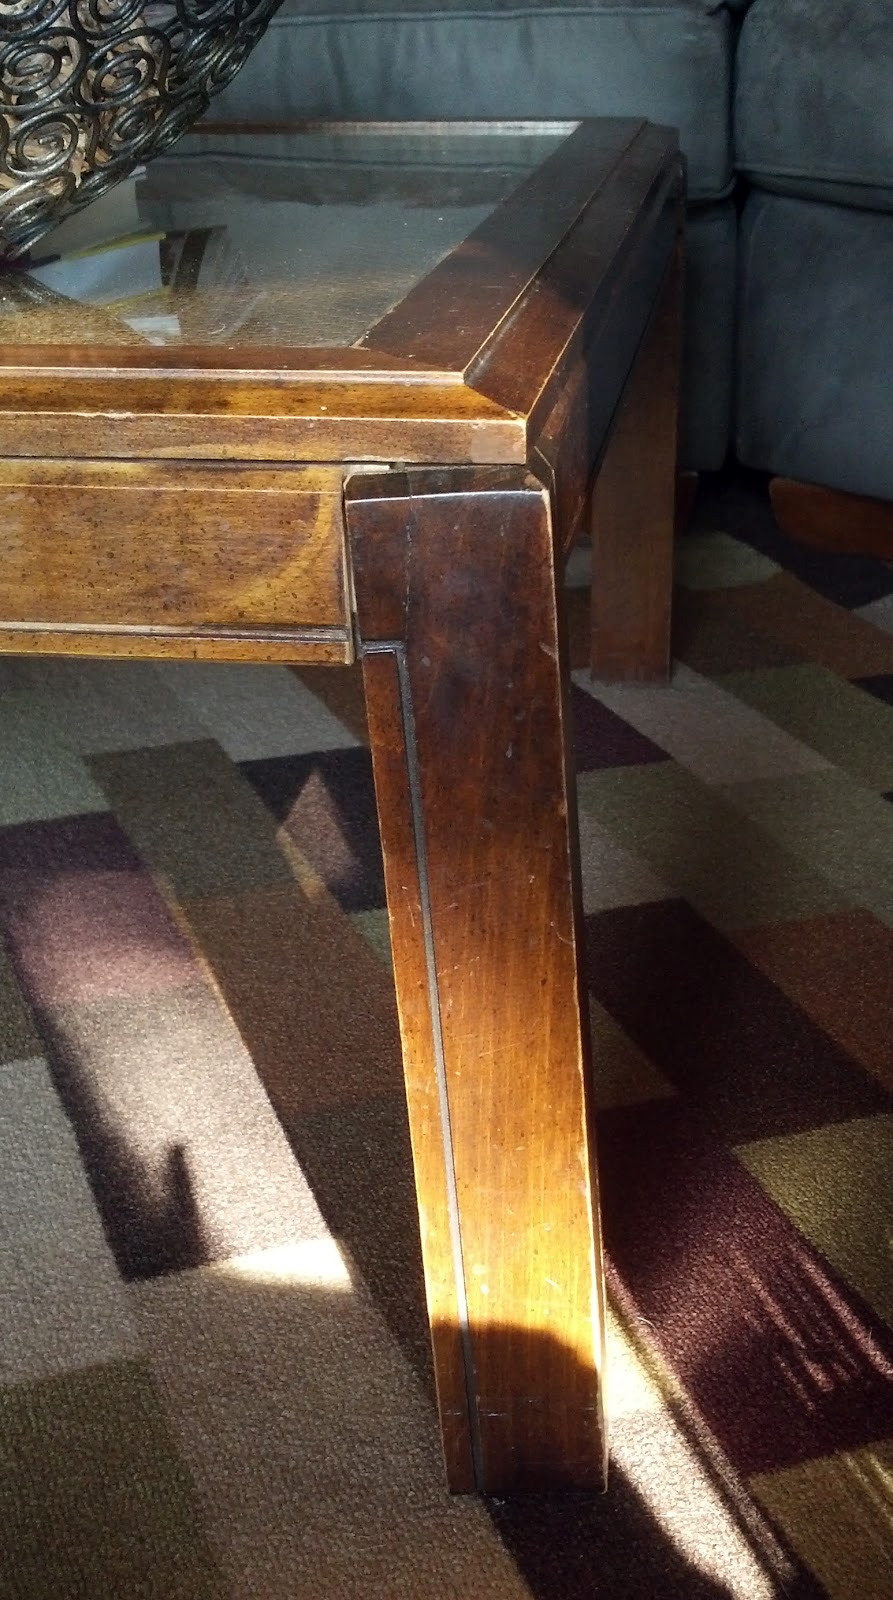
A leg of our old coffee table is about to give out. The reason why? My kitchen table is where my laptop sits along with my printer, usually parts/materials to a half dozen upcoming projects, unopened mail… and opened mail, magazines for ideas and well, you get the point. Our coffee table is the “dining room table”. So the legs get a lot of wear and tear from being pushed in and scooted out for meal times.

It’s a little wobbly

Regardless of whether your an artist or creative, I refuse to pay $500+ for a new coffee table. My first thought was making a pallet coffee table. Pallets are free and with a few scrapes of wood you could throw it together fairly easy. BUT, everyone’s doing that now, so I had to find something unique. 😉 I started sketching out some drawings for building my own table and then the idea came to me and I knew it was something original. I saw online someone had taken an old wine crate and put casters on the bottom. I believe they were using it for some kind of storage container but it got me thinking…..

Materials:
~ 4 Wooden Crates – I already had one on hand from Michael’s so I bought 3 more. Using their 40% coupon for each crate they came to just over $7 each. (I’d love to make a table with actual vintage wine crates) Crates are 12.5″W x 18″L x 9.5″H.
~ Two 1x2x6 – I used Pine but it shouldn’t matter
~ 4 Casters – I already had these on hand but this is one thing I would change. I thought about trying to rust these a little but I actually wanted the functionality to be able to un/lock the wheels and I was afraid intentionally rusting them would cause some problems. So next time I’ll look for casters that are all black or have a rustic look.

Optional Materials:
~ Images (not necessary if you use a real wine crate) – I found one on The Graphics Fairy and a few others online
~ Vinegar, steel wool and brewed tea
~ A variety of screws, nails, L brackets, and bolts
~ Satin Polyurethane

Final Dimensions: 27″W x 27″D x 17″H
Total Cost: $7 (x4 crates), $8 worth of wood for the frame and $7 per caster = $64 
*price does not include screws, nails, stain or finish.  

I’m not intentionally being vague but unless you go out to buy these exact crates from Michael’s then your measurements are going to be completely different than mine.

I figured out the arrangement of the crates. Don’t worry about the hole in the middle, I’ll get to it.

My first step should have been to stain all the crates before I started screwing them together. Would have made that job a whole lot easier. However, I started by building a frame. This would not only be a solid foundation but it would give me a piece of wood much thicker than the crates to screw in the casters. You’ll notice I arrange the crates how I wanted them. I based my measurements for the frame on this. For extra support, where the sides of the frame connect I drilled holes in the sides of each board, filled the holes with wood glue, placed dowels into each hole and fit the pieces together. For the middle boards (that create the + ), I secured them to the frame using L brackets. 

I first nailed the crates to hold them in place temporarily. I then went back with screws and removed the nails when I was done. Now, thanks to Bob Ross, “There are no mistake, only happy accidents.” That hole in the middle… what to do with it? Make it one of the features! At first I thought about making it a planter box but remembered all the times we’ve throw magazines, books, PS3 remotes (Honey!) onto the table and figured a plant wouldn’t survive. So I thought I’d tie it together with my River Rock Side Table. Unfortunately I’m out of rocks so I had to improvise. I flipped the crates upside down, used a few scrap pieces of wood and L brackets. I only wanted the hole to be about 4-5 inches but you could make it taller depending on where you place the brackets. Just remember it’s upside down, so the closer your L brackets are to you, the deep hole you’ll have.

Next I transferred over my wine images. Again, I need to change the order of this step. Once I stained the wood the images were almost completely gone. But at the time they looked great!

The Graphic Fairy provided this graphic
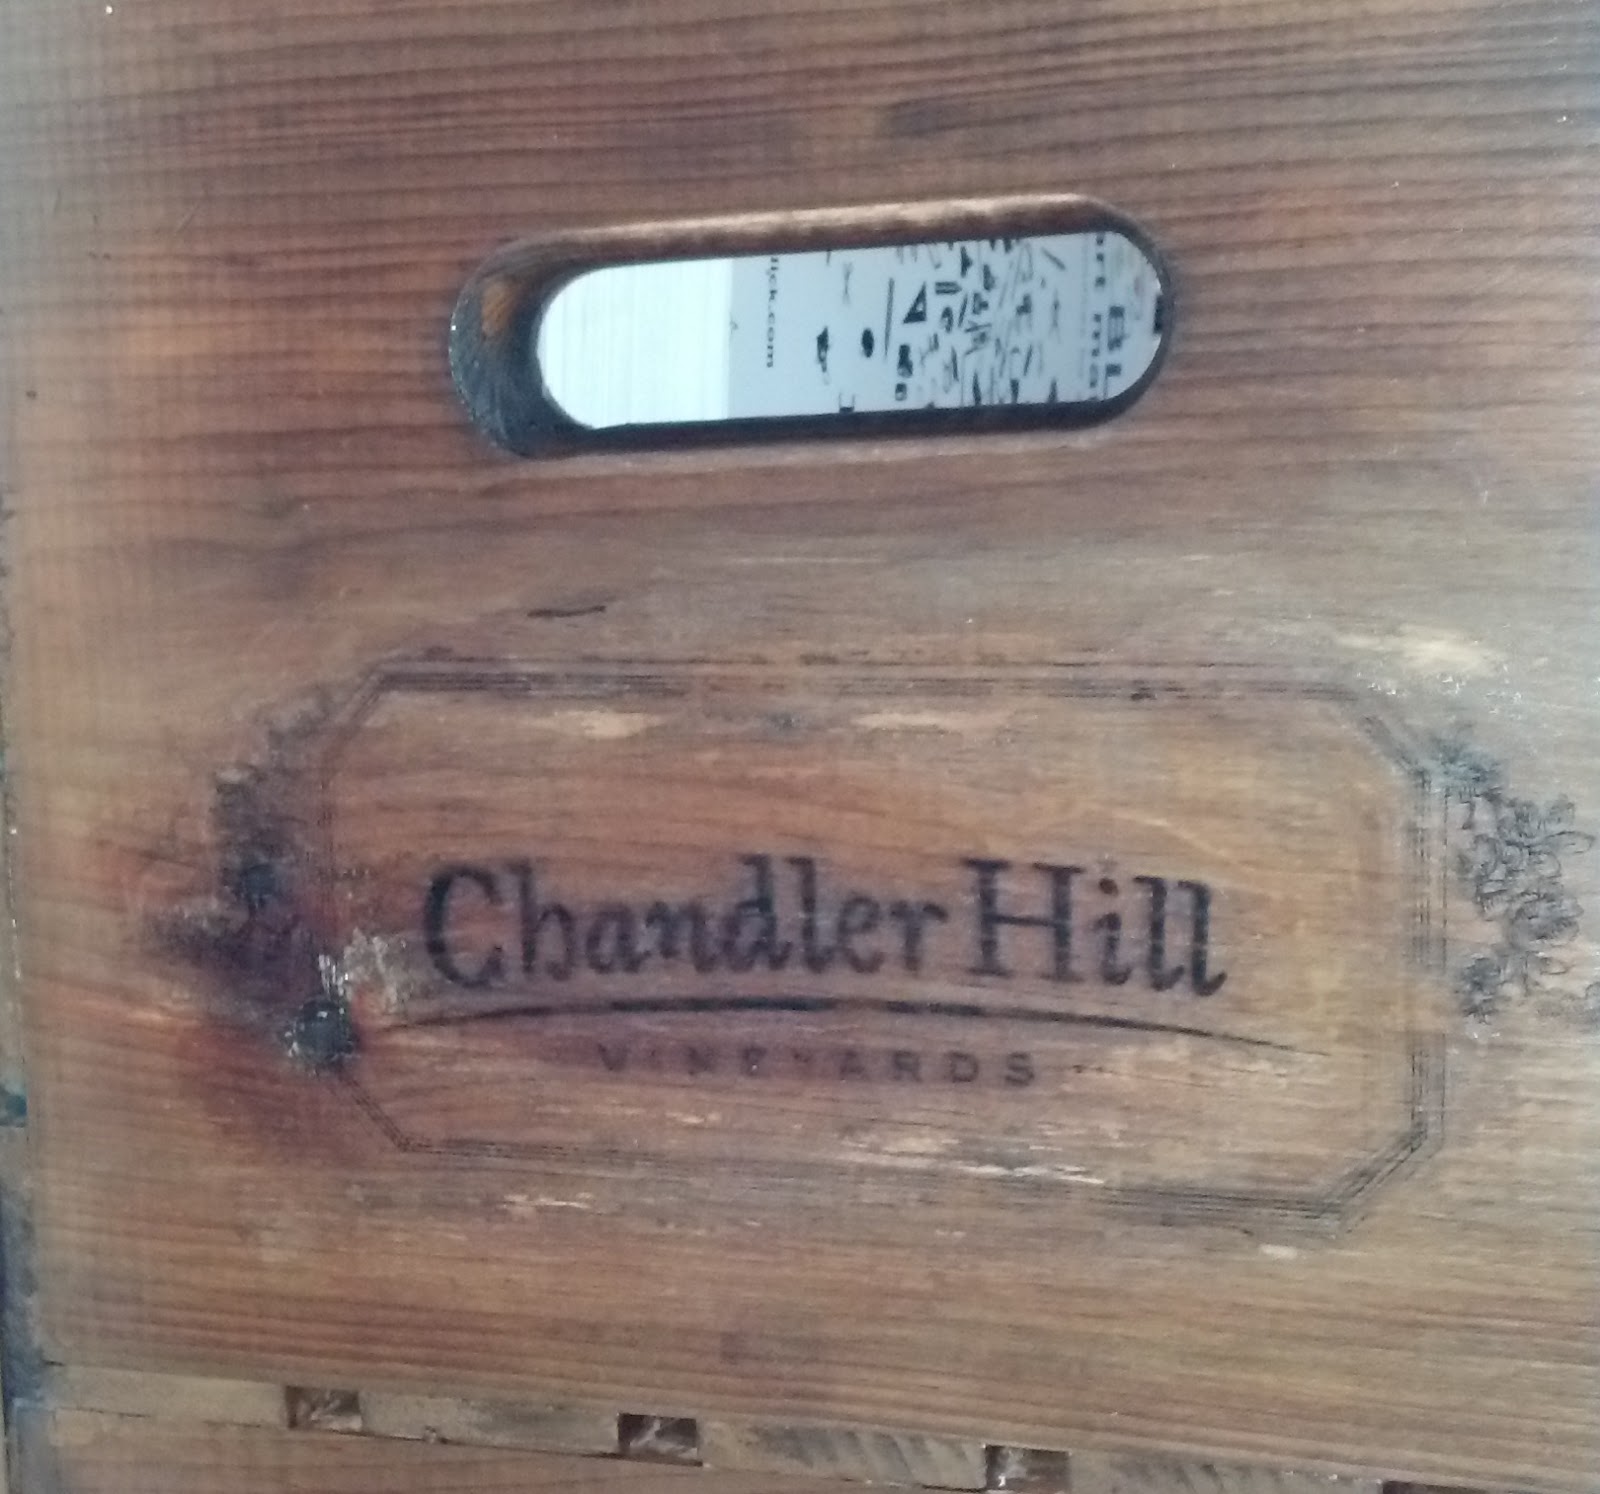
I also used this border from The Graphics Fairy with our fav
winery, Chandler Hill in the middle

*** UPDATE
My Transferring Images to Wood Tutorial has now been posted.

Stain time! 24 hours before staining I put about 2 cups of vinegar in a container along with a steel pad (SOS pad) and let it sit overnight. Right before I planned to stain I heated about 4 cups of water until it was almost boiling and then steeped 2 bags of tea. (I’m guessing the flavor of tea doesn’t matter considering a used Lipton’s Mango Team. Definitely made the basement smell good.) After the tea has steeped for a bit use a paint brush and coat your wood with the tea. The 4 cups I used was just enough to cover all the wood and a little more.

It’s a little hard to tell but the wood will be a little darker from
the tea.

Grab another brush and use your vinegar/wool solution. It should be a nice, murky brown by now. Start painting the wood. Please don’t freak! The wood will look almost black. I had a slight panic attack and tried to quickly wipe away the stain (which, by the way, doesn’t help).

Don’t plan on reusing your Tupperware container… unless
you’re staining something else.

Feeling defeated I continued on, counting the amount of money and time I’d already invested only to have to start over. Don’t stress too much if it’s darker than you think you’ll like. Over the next 24 hours the stain really soaked into the wood and the color lightened.

Honestly, when I put my stain on the wood looked
black, but it lightened up quite a bit

Next, sanding…. *insert major groan*! I don’t know why but this is the worst part for me. Maybe it’s because every year since turning 25 my allergies get worse and worse. But in all honesty I hated it before that. I think my hatred has only increased since then because now I know I HAVE to wear a mask which I always considered optional before.

I tried to smile and look happy but 1) I’m wearing a mask and
2) I wasn’t very happy.

I threw the casters on the bottom and was starting to get pretty pumped about the table. Just a few more steps.

I really wish I had more rustic looking wheels. :/

I went back and tried to redo my wine label transfers. Some of them worked. I had one side so messed up I was about it pull my hair out! This side will face away from the main traffic in the living room. 😉

I think I might have been too excited. I printed a reverse image
and then covered the print in Mod Podge and waited for it to dry
Or at least I thought I waited. The Graphics Fairy imaged turned
out the best out of all of them.

Last but not least, polyurethane. I used a Satin finish. Next time (if I choose to create another for some reason) I would use a lighter stain and I would like to try a beeswax sealer. I haven’t found it in any store but I did find how to make your own on Pinterest!

Tada!

I’ve scoured the internet trying to find a Wine Crate Coffee Table and have not been able to find one like mine. (I’m going to feel like an idiot if one of you come back saying you found one) While this project cost more than I typically like to spend, it was definitely NOT anywhere close to crossing over into double digits never mind closing in on a grand!

This is about as close as I could get. I do love the wheels on this
table and it’s made from reclaimed wine crates. You can find
it online at Hudson Goods. But can you believe the price tag?

Here are a few more shots with some of my New Addition items added in.

A few books from Goodwill
A few of my favorite inspirational magazines. Also included
are my “coasters” also known as cheap tiles from Lowes. They’ll
be revamped this week and get their own blog.
More magazines to flip through. And every artist’s dream
catalog…. Dick Blick. It’s almost the size of a phone book!
LOVE IT!
Here was my thought with the coasters. When people use
them and the coasters themselves become soaked, what do
you do? Well, now I have a way dry them off for a while.
I think it’ll work a little better once I have rocks but the
corks should do a pretty fabulous job in the meantime.

O Movember (Moustache + November) – o que é?

Movember (Moustache + November) existe desde 2003 e consiste em um movimento para arrecadar fundos (doações) para a luta contra o câncer de próstata. Começou na Austrália  e depois se expandiu para mais 9 países, incluindo EUA e o Reino Unido. Até o ano passado já foram arrecadados aproximadamente R$294 milhões. Estas doações são repassadas a instituições e fundações ligadas ao tratamento do câncer, apoio aos pacientes e à pesquisas.

Funciona da seguinte forma, e até você pode participar! Pessoas se cadastram no site da fundação Movember, que se torna uma espécie de rede social nesta época. Os homens fazem a barba no dia 1º de Novembro e tem que deixar apenas o bigode crescer até o fim do mês, que se tornará o símbolo da saúde masculina. Durante este período eles podem ir colocando fotos do processo e arrecadando doações de qualquer parte do mundo.

Partilhe o seu amor e apoio, com um cartaz fresco ou dar uma festa Movember, preencha com adereços e decoração, afinal estamos em Novembro! Bjs.

PRETTY BLOG movember party by SEVEN SWANS 2 Celebrate Movember {DIY}

Guirlandas de presente

Guirlandas de presente!

Podem ser usados ​​para adicionar um toque especial de decoração para presentes, como decorações móveis pendurados, luzes ou janelas ou até mesmo para enfeitar a árvore de Natal do final do ano.

BS DIY GiftGarlands2012 07 01 Gift Garlands


BS DIY GiftGarlands2012 07 02 Gift Garlands

BS DIY GiftGarlands2012 07 03 Gift Garlands


BS DIY GiftGarlands2012 07 04 Gift Garlands


BS DIY GiftGarlands2012 07 05 Gift Garlands


BS DIY GiftGarlands2012 07 06 Gift Garlands


Smitten / Home Life

We love showcasing real homes every Tuesday but we also love showcasing some of our favourite shops.  Shops where you can find all those little treasures that turns your house into a home. 

Today we visit Smitten a lifestyle boutique specialising in gifts, decor,homeware and clothing.Smitten opened it’s doors at The  Farriers Centre, Constantia in October last year. Owners Charlene and Tracey created a gorgeous, inspirational little space filled to the brim will all things pretty. If you’re in the area, do pop in. We guarantee you will be smitten!

Claudia de Nobrega took all the gorgeous pictures.


cape town decor shop 001 Smitten {Home Life}
cape town decor shop 002 Smitten {Home Life}
cape town decor shop 003 Smitten {Home Life}
cape town decor shop 004 Smitten {Home Life}
cape town decor shop 005 Smitten {Home Life}
cape town decor shop 006 Smitten {Home Life}
cape town decor shop 007 Smitten {Home Life}
cape town decor shop 008 Smitten {Home Life}
cape town decor shop 009 Smitten {Home Life}
cape town decor shop 010 Smitten {Home Life}
cape town decor shop 011 Smitten {Home Life}
cape town decor shop 012 Smitten {Home Life}
cape town decor shop 013 Smitten {Home Life}
cape town decor shop 014 Smitten {Home Life}
cape town decor shop 015 Smitten {Home Life}
cape town decor shop 016 Smitten {Home Life}
cape town decor shop 017 Smitten {Home Life}
cape town decor shop 018 Smitten {Home Life}
cape town decor shop 019 Smitten {Home Life}
cape town decor shop 020 Smitten {Home Life}
cape town decor shop 021 Smitten {Home Life}


Já faz 35 anos desde a morte de Elvis Presley, mas o ídolo continua exercendo fascínio como poucos outros mitos da música conseguem exercer. E por mais que o tempo passe e detalhes sobre sua vida sejam divulgados, sempre há público disposto a conhecer ainda mais sobre a trajetória de sucesso do Rei do Rock.

Na última terça-feira, chegou em São Paulo a maior mostra já montada sobre o cantor fora de Graceland, mansão onde viveu até sua morte. Elvis Experience é um grande tributo ao músico, com preciosidades que vão desde vídeos de família até objetos como o telefone de ouro que ficava em sua mesa de trabalho. Tudo isso estará reunido no Shopping Eldorado, em Pinheiros, até o dia 5 de novembro. Também acontecerão shows-tributo em São Paulo, Rio de Janeiro e em Brasília, com músicos se apresentando ao lado de Elvis.

A tenda climatizada onde a exposição foi montada tem 2 mil metros quadrados e 16 ambientes. A exposição é interativa e montada de forma linear, dispondo os itens cronologicamente.

Elvis Experience Brasil começa com a Sala de Equalização, onde o visitante é convidado a imergir no mundo do cantor. A partir daí, seguem as salas falando de sua infância, a primeira gravação, revivendo as instalações da gravadora Sun, a passagem pelo exército, cenas dos 31 filmes que tiveram participação do astro, o retorno aos palcos, a vida em Graceland, com direito a objetos pessoais, carros, hobbies, prêmios e, claro, os figurinos. A maratona chega até sua morte, com dezenas de noticiários anunciando a perda do maior ídolo do rock. A exposição prossegue mostrando porque Elvis não morreu e termina em um ambiente de serviços, com espaço kids, lanchonete temática e loja, entre outras atrações.

Angie Marchese, curadora-geral de Graceland, é uma das entusiastas da exposição. “Elvis Experience Brasil é a primeira do seu gênero. É a maior exposição já feita fora de Graceland e a primeira em que a Elvis Presley Enterprises se envolveu. Nós vasculhamos os arquivos e selecionamos várias raridades e itens nunca antes exibidos. Até peças que nunca deixaram Graceland, incluindo jóias, recibos e documentos, bem como o famoso macacão com tema de águia, que Elvis usou no Havaí em 1973, um de seus carros, o Lincoln Continental Mark II de 1956, a Harley Davidson preta de 1976 e ainda a roupa usada no encontro com o presidente Nixon, em 1976, na Casa Branca. Elvis Experience será a experiência mais imperdível do ano”, diz.

Priscilla Presley, que foi casada com Elvis por pouco mais de cinco anos, casamento do qual nasceu Lisa Marie Presley, veio ao Brasil para apresentar a mostra.


Veja o vídeo abaixo, com a apresentação do projeto, e conheça mais sobre o que o aguarda na Elvis Experience Brasil, em São Paulo.


Serviço:

The Elvis Experience
Entre 5 de setembro e 5 de novembro, de segunda a segunda, das 10h às 22h
Shopping Eldorado – Pinheiros
Vendas online: www.ingressorapido.com.br
Informações: 4003-1212
Preços da primeira semana (há meia entrada): R$ 100 (horário livre) ou R$ 200 (premium express)
Preços da segunda semana (há meia entrada): R$ 40 (segunda a sexta, entre 10h e 18h), R$ 60 (segunda a sexta, entre 18h e 22h e sábados e domingo, das 10h às 22h) ou R$ 200 (premium express)

Elvis in Concert
Brasília
6 de outubro, às 21h
Ginásio Nilson Nelson – SRPN – Ginásio Nilson Nelson – ASA NORTE
R$ 2800 (mesa com quatro lugares), R$ 300 (cadeira VIP), R$ 200 (cadeira inferior), R$ 100 (cadeira superior) ou R$ (primeiros 100 ingressos da cadeira superior) – há meia entrada
Vendas online: www.ingressorapido.com.br
Informações: 4003-1212

São Paulo
8 de outubro, às 21h
Ginásio do Ibirapuera – Rua Manoel da Nóbrega, 1.361 – Ibirapuera
Primeiro lote: R$ 600 (cadeira premium), R$ 500 (cadeira VIP), R$ 300 (cadeira inferior), R$ 180 (cadeira superior) ou R$ (primeiros 100 ingressos da cadeira superior) – há meia entrada
Vendas online: www.ingressorapido.com.br
Informações: 4003-1212

Show extra em SP
9 de outubro, às 21h
Ginásio do Ibirapuera – Rua Manoel da Nóbrega, 1.361 – Ibirapuera
Primeiro lote: R$ 1200 (cadeira super premium), R$ 800 (cadeira premium), R$ 700 (cadeira VIP), R$ 500 (cadeira inferior) ou R$ 200 (cadeira superior) – há meia entrada
Vendas online: www.ingressorapido.com.br
Informações: 4003-1212

Rio de Janeiro
11 de outubro, às 21h
Ginásio Maracanãzinho – Rua Prof. Eurico Rabelo, S/N – MARACANÃ
R$ 500 (cadeira premium), R$ 300 (cadeira VIP), R$ 200 (cadeira inferior), R$ 150 (cadeira superior), R$ 40 (primeiros 100 ingressos da cadeira superior) – há meia entrada
Vendas online: www.ingressorapido.com.br
Informações: 4003-1212


Fonte: Vá de Vintage